# Devices
# List
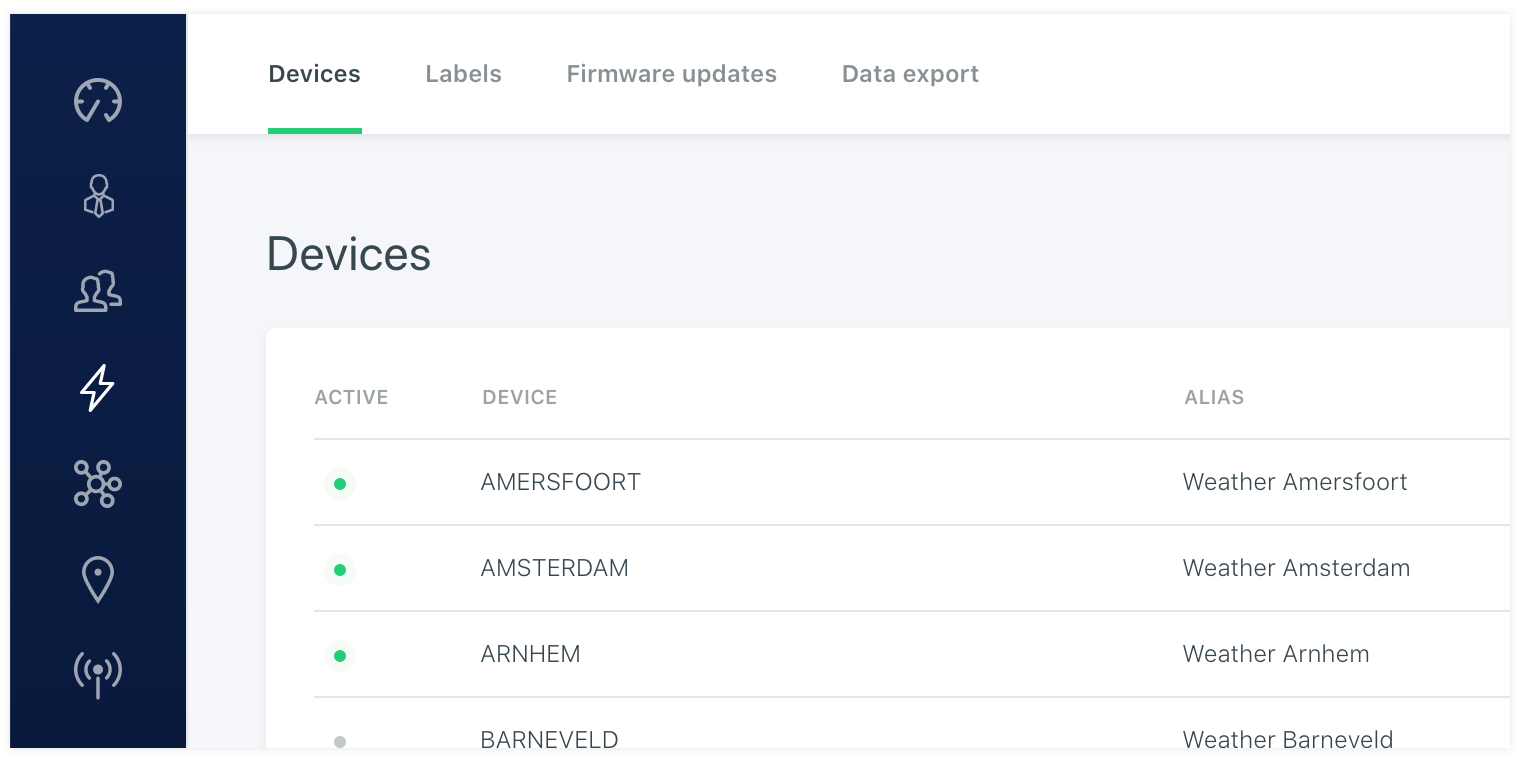
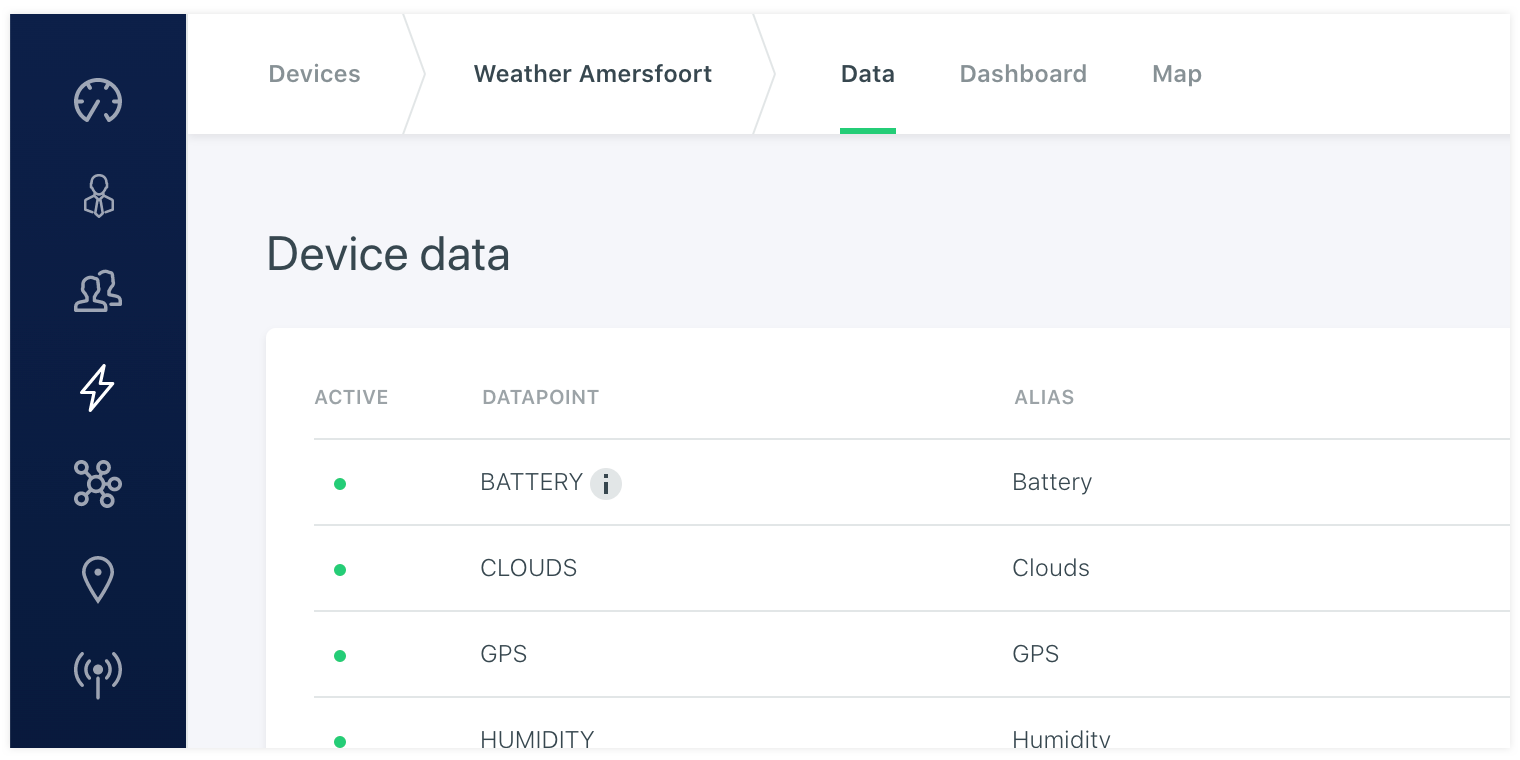
The device pages will show a list with the registered devices to the platform. These are all the devices that the platform has registered based on a unique device name. When a new device starts to send in data the platform will notice and creates it in the platform. After that it is available to the vanity account user in the platform and it will have datapoints attached to it. You can see these under the Data tab on the details of the device.
Parent device
When a device has as a gateway and is acting as a slave of another device you can set this up in the device settings. You can select another device to connect the device as slave. This is needed if a device has no internet connection on its own and is not sending data to the platform directly, but this is done by the connected gateway. When you have set this relation you are able to use the callback meganism of the platform. Instead of sending the callback message directly to the device, the system will send the data to the gateway with the reference of its slave id.
WARNING
It is important that the gateway is programmed in a way that it can be forward callback data to the slave device.
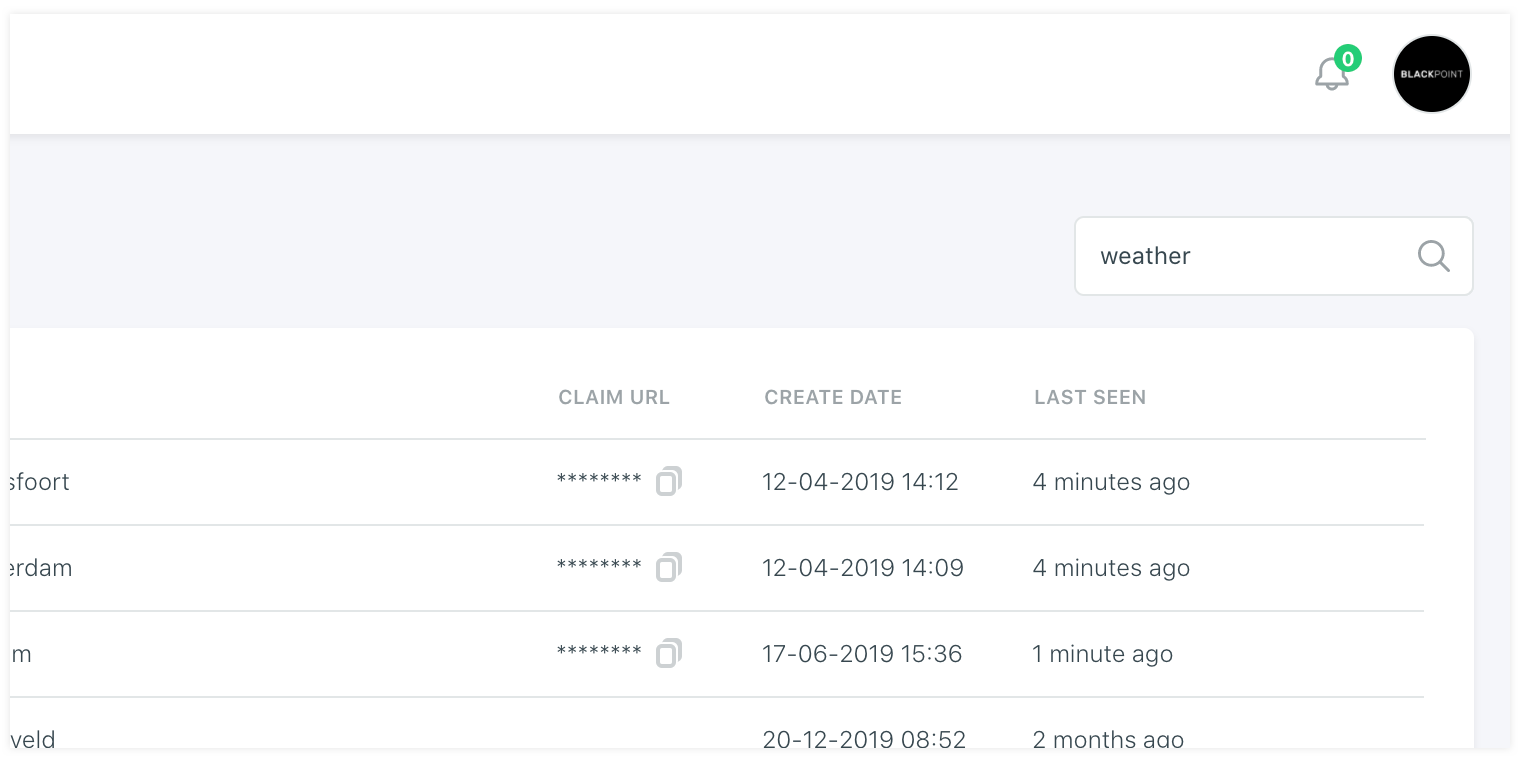
Claim url
Instead of assiging a device to a client it is possible to create a claim url for a device. This will be easy if you have a lot of devices already connected to the platform but have not delivered it to a client yet. In this case you are able to generate stock. You can connect devices already to the platform and distrubute them to clients you might not even know about. The device can be booted and it will come online. Togheter with the device you can supply the claim url and or the QR code that is corresponding with it. This will let the user of the client that has permissions to claim devices to fill in the claim code and unique number in the portal and grant itself access to the device. For example only a client admin can have the claim function enabled and will be able to grant itself access to the device. It can then distrubute the device access under other users within the client account. The claim url and claim code will only work with all organisations under the vanity account. So other vanity accounts will not be able to claim the device and grant itself access.
# Last update
The device has a couple of detail pages. One of this is the data page. This is a list of datapoints that are send and attached to the device and will update on the fly. So if new data is incoming the device list will autorefresh its data. You can see if the data is live by the green dot. On the device edit you are able to set its Update frequency. This is not a setting of the device, but is a time window in the platform where it determines if the device is alive or not. You can set this up in seconds. So if a device is alive once a day you set it up to 86400. But if its suppose to be alive every hour you can set it to 3600. If it is alive faster you can adjust the expected update frequency accordingly. It is an indicator on when to expect new data and show you the status by the dot if this threshold is not corresponding with the actual data interval.
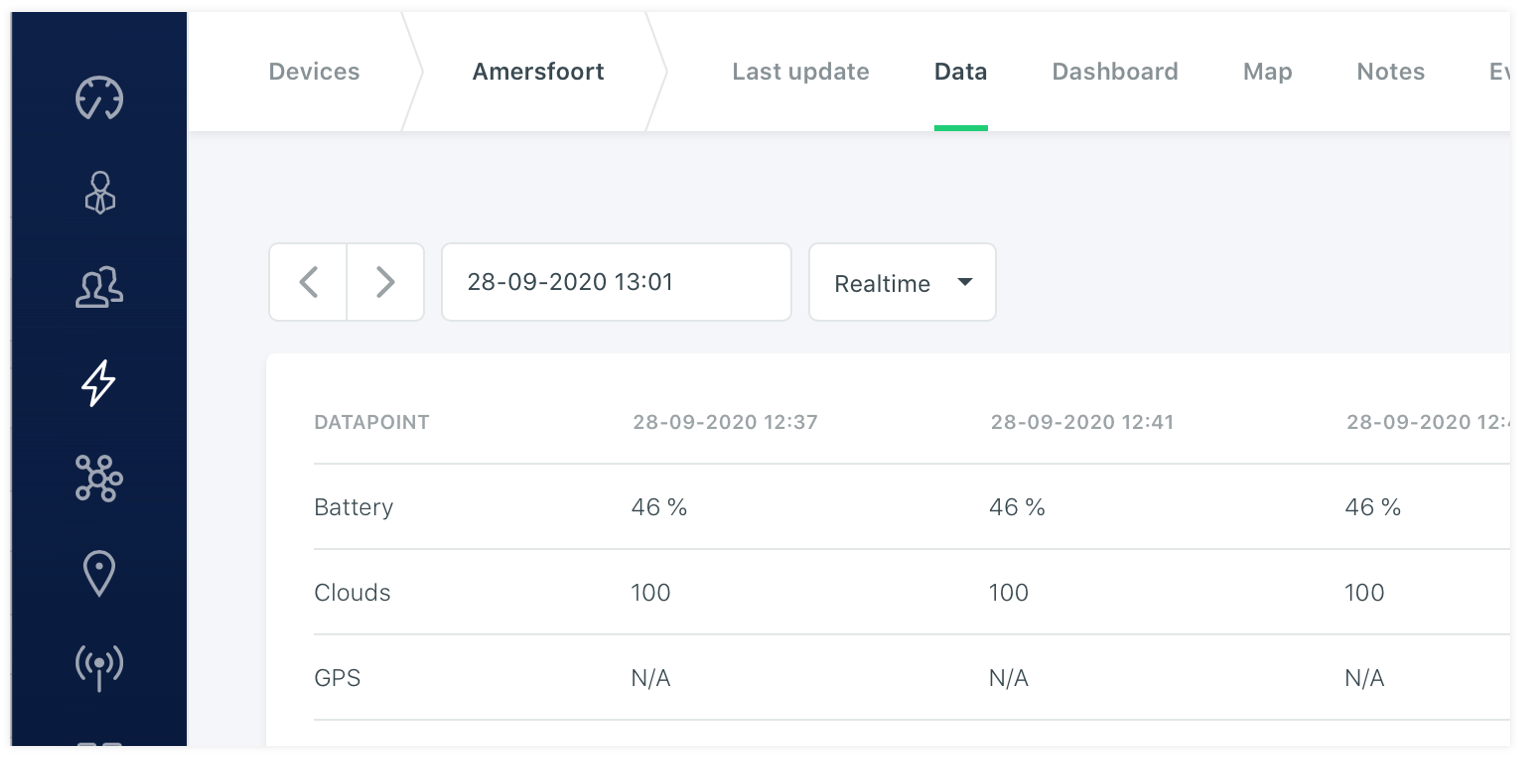
# Data (inspector)
On the data page you can see the actual data present in the database. You can scroll through it or use the date selector to view the data on a spcific time. The data is showed aggregated or raw and it is possible to click on the values to the detailed information. Like description and location atributes besides the value atribute of the datapoint.
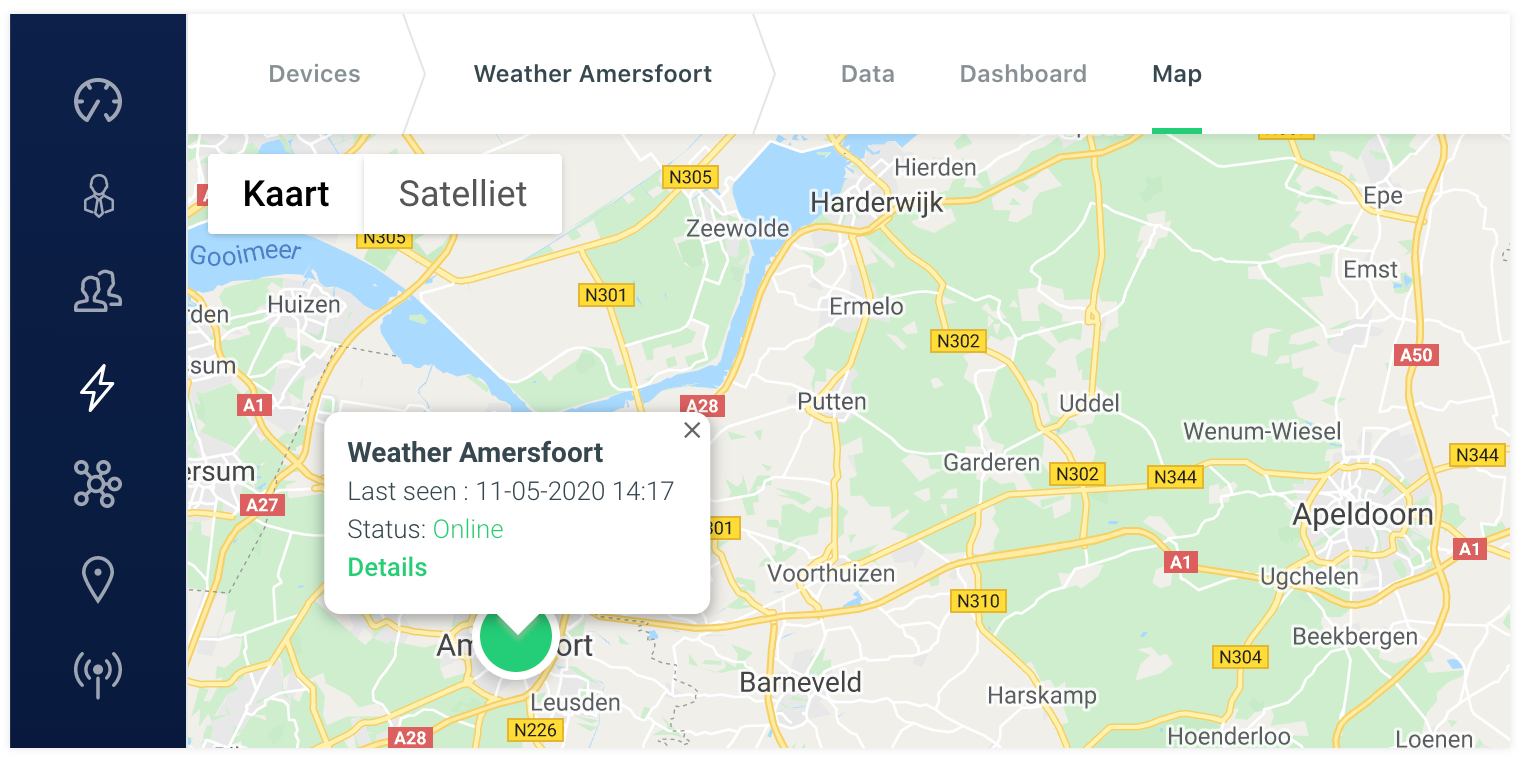
# Location
If the device has at least one datapoint that has GPS coordinates it will enable the map page and show its location on the map. This is only showing if the device has at least one datapoint with a l attribute with a latitude and longitude that is send to the platform. Otherwise it is not relevant and the page will be hidden. The map is showing it latest data projected on the map. This way you are able to view its last position.
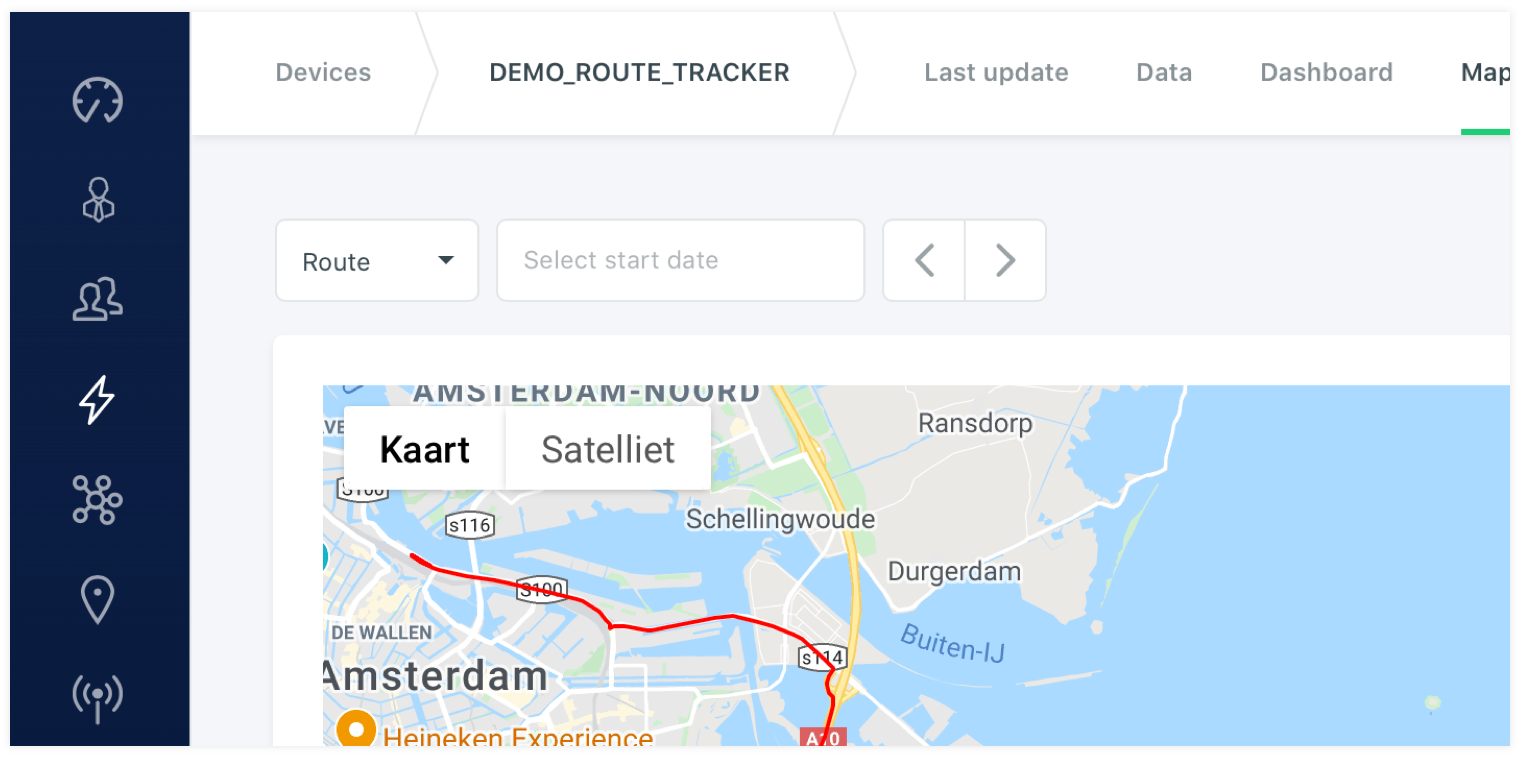
# Route
Devices that send GPS coordinates can use the route function. This will draw a route on the map of the last 24 hour. When using the trips functionality it can also be a longer period in time. You will need to go to trips and select a trip to see the whole route a device registered in the selected trip time window.
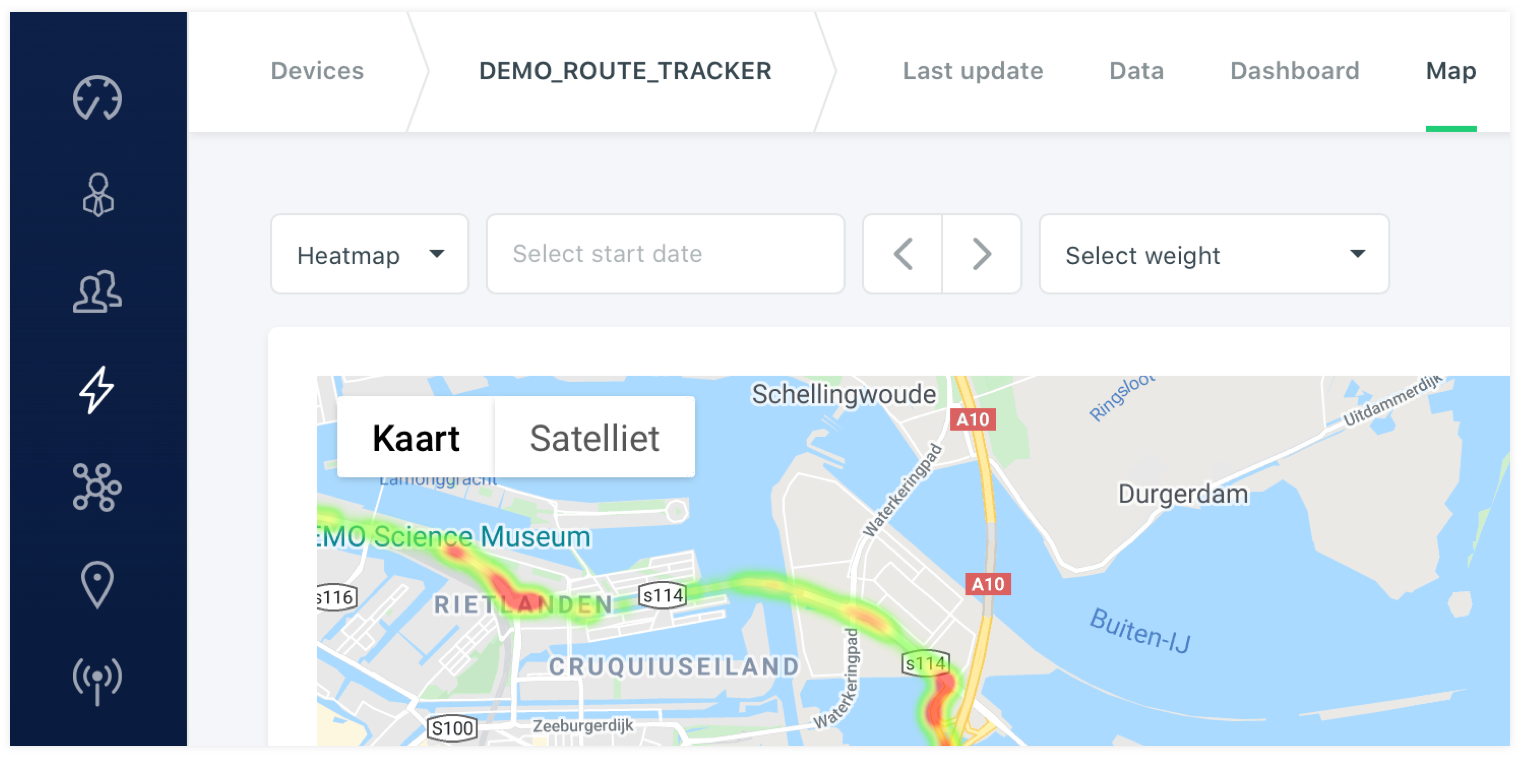
# Heatmap
Devices that send GPS coordinates can use the heatmap function. Besides the GPS coordinates you can select a weight as secundary datapoint. This way heavy weight dots on the map color deeper red then light weight dots. The heatmap is usefull to see where a device has been the most in the selected 24h timewindow, but also togheter with the weight datapoint to see the releation of the location and another datapoint.
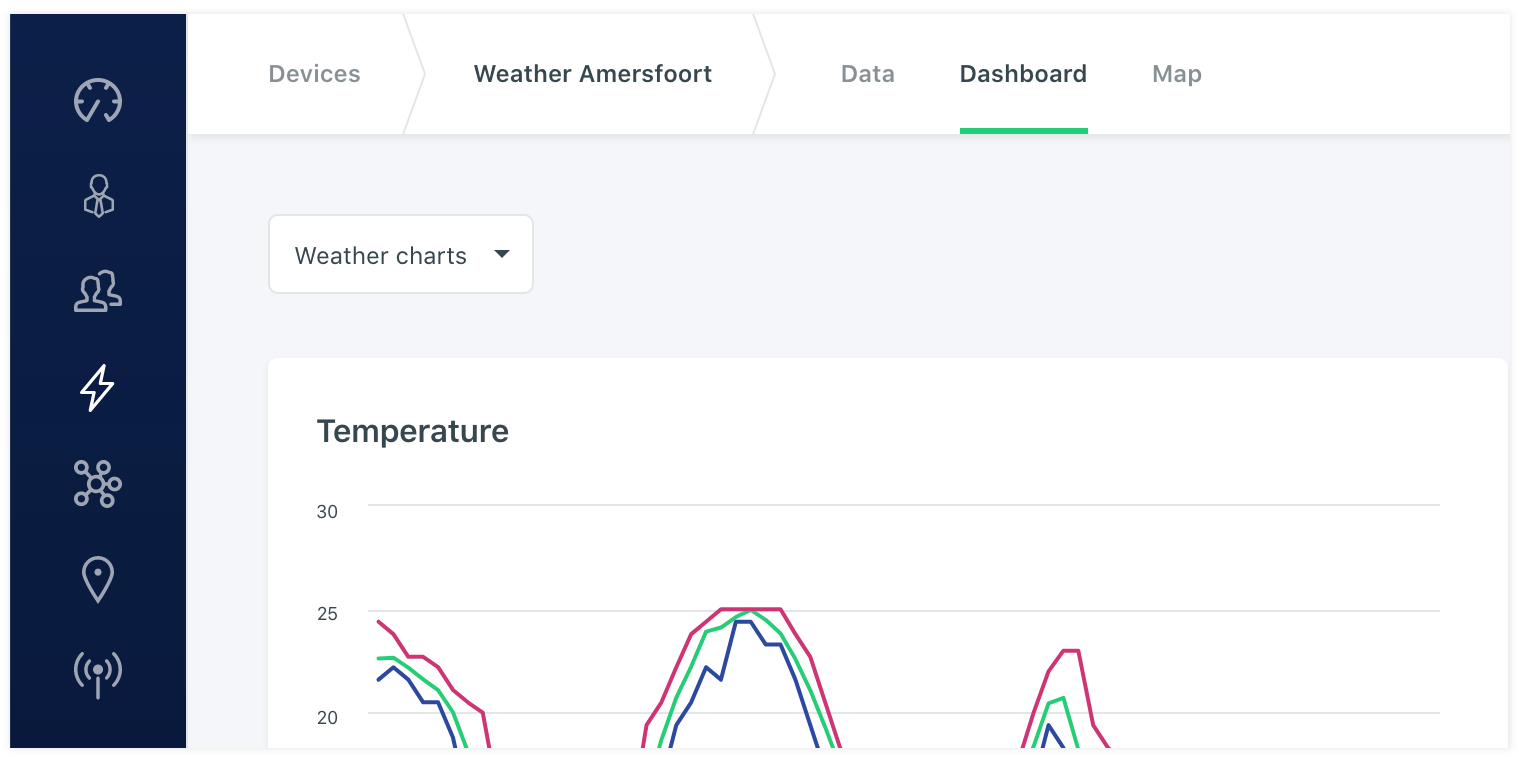
# Dashboards
An device can have one or more dashboards assigned to it. You can do this by editing the dashboard and assign it to a label, or directly to a device. When the link if made the device details will load the assigned dashboards and will try to fill it with the assigned datapoints in the dashboards. This way you can assign a dashboard at once by adding labels to a dashboard and to devices and wont need to make a dashboard on a per device basis. This can be done aswell by assigning the dashboard only to a specific device and not to a label. You can use the dropdown on the dashboard to swith to another assigned dashboard on the device detail page.
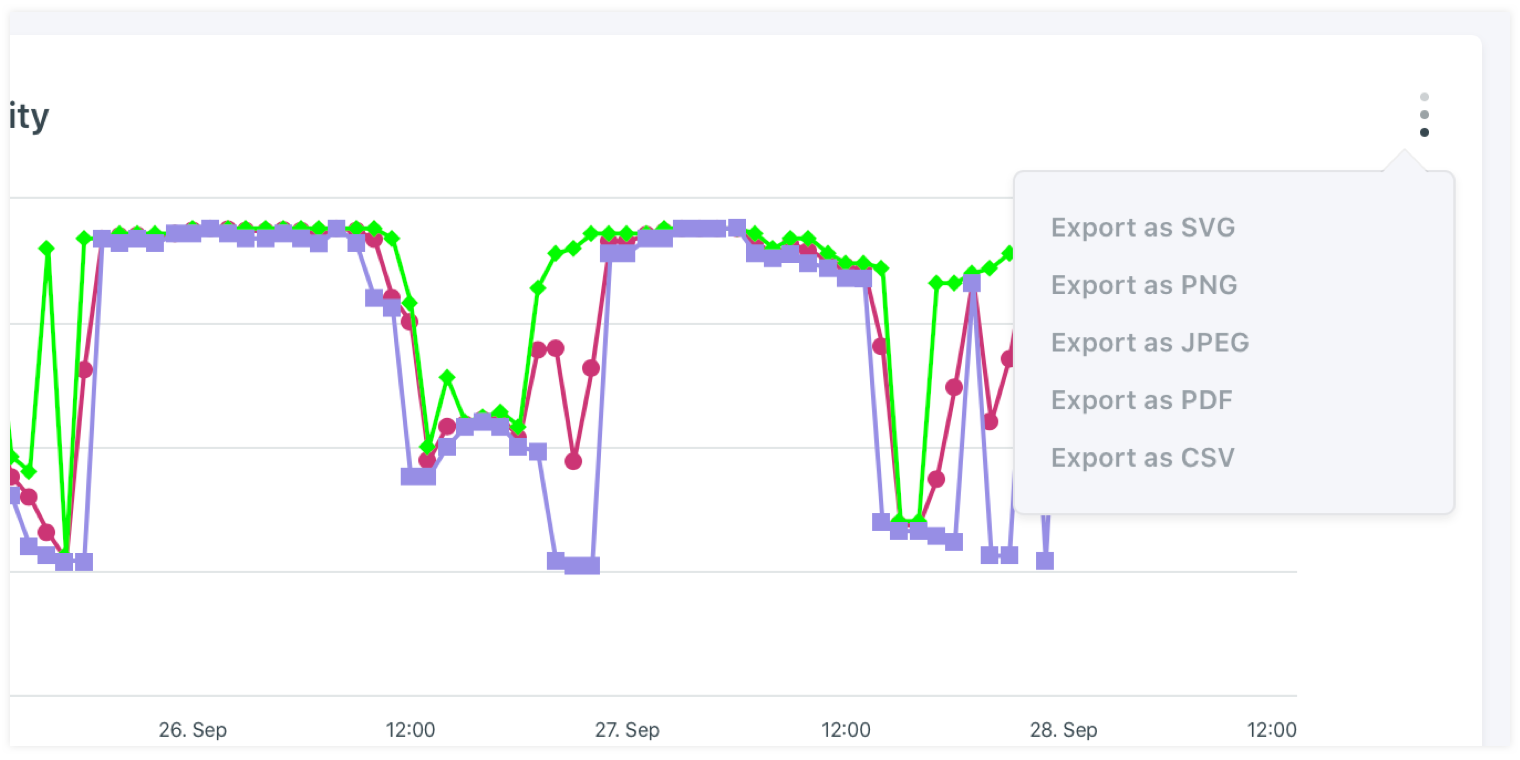
# Chart exports
On the dashboards there is an option to export the selected chart with different export options. The extension of the export file that can be selected are PNG, JPEG, SVG, PDF and CSV.
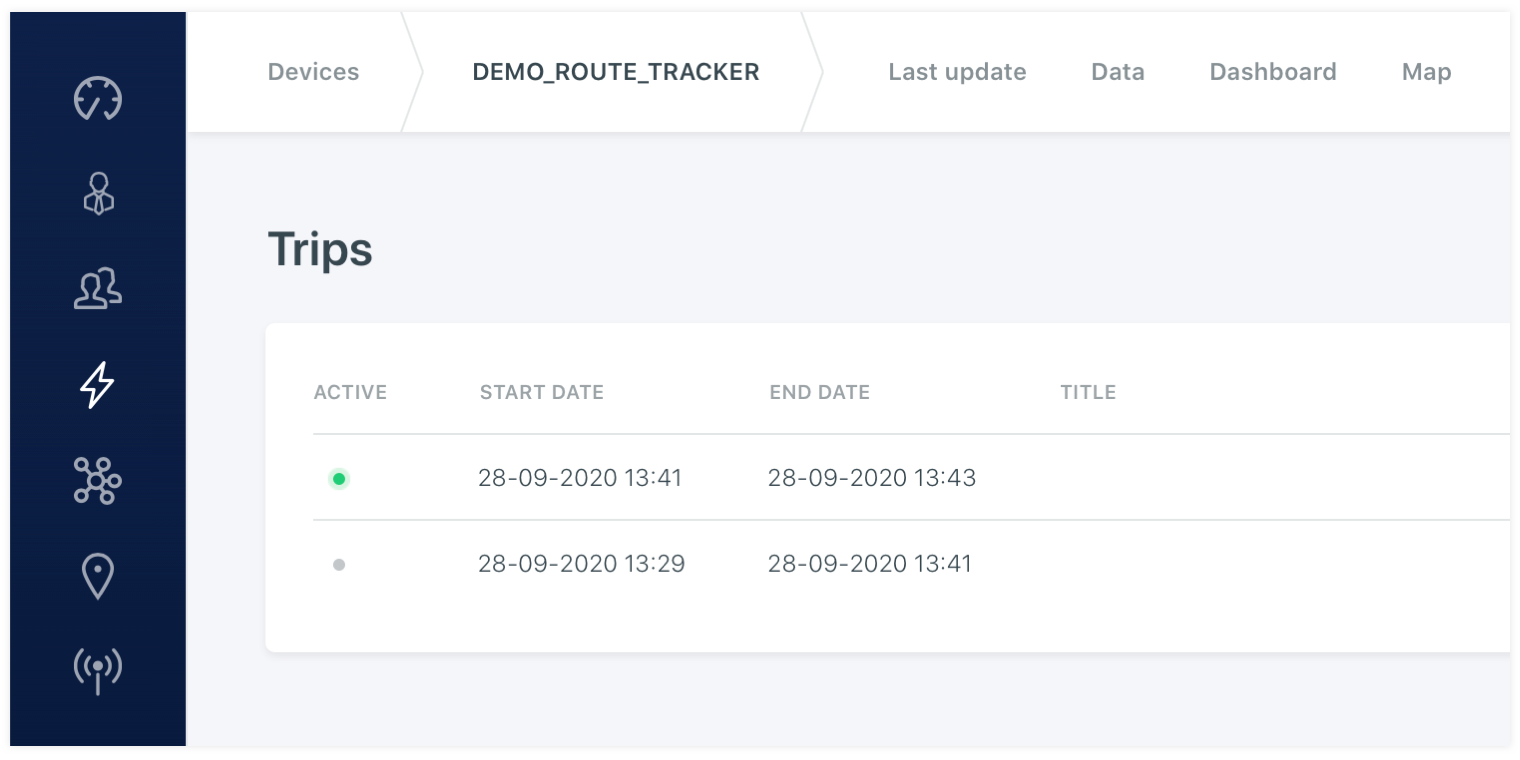
# Trips
A device can send a trip datapoint with true (1) or false (0) to the platform. This will trigger the system to start or stop a trip row on the trip page. When a trip packet is received the trip wil get a started status with the last known start and end time. If a second trip start packet is send it will show the trip as running. Only when a trip = false is send the trip will close. When you click on the trip it will open its details together with the trip dashboards and the map with the drawn trip on it. You are able to switch to the heatmap selector to show the route with a selected weight datapoint.
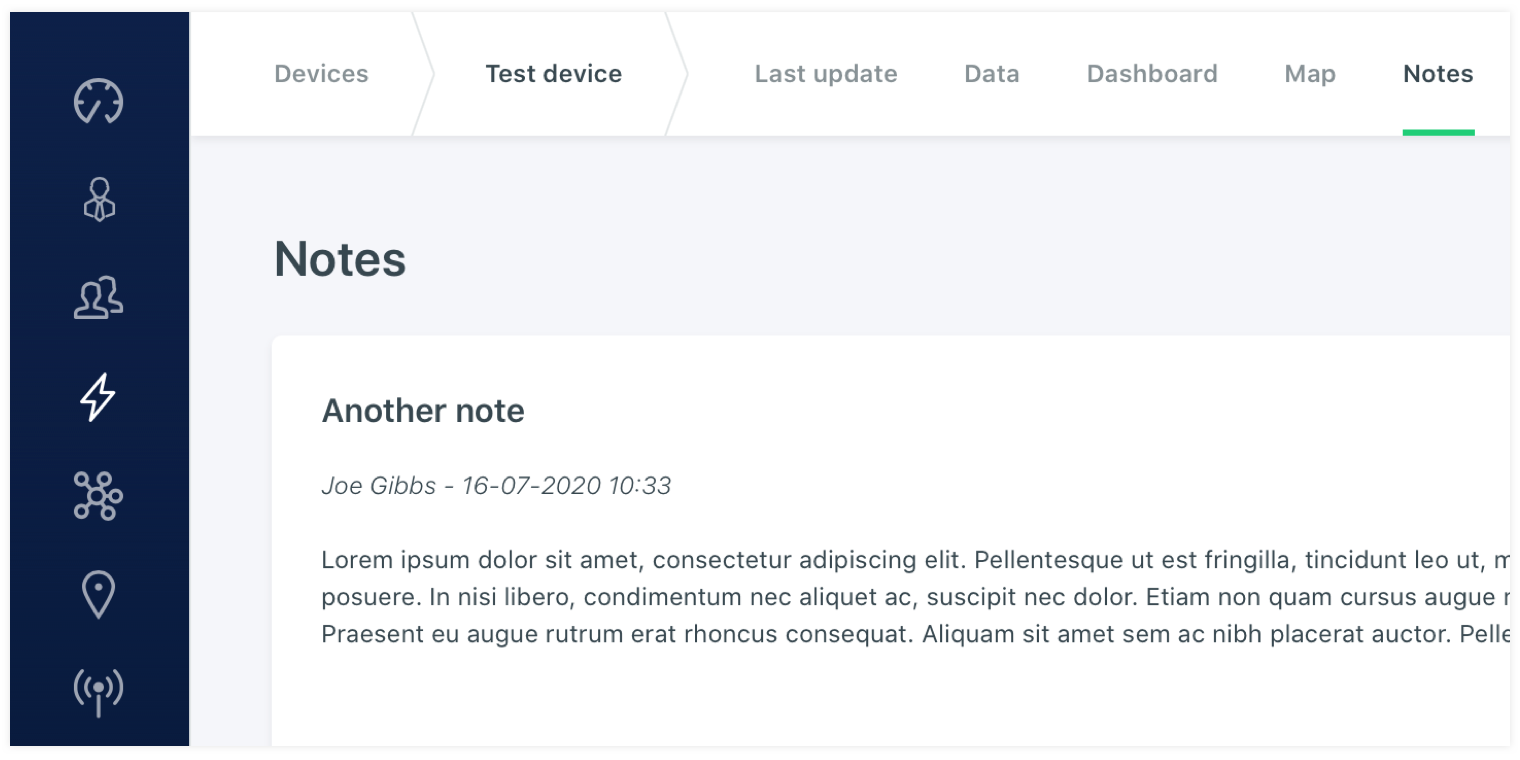
# Notes
It is possible to add a note with an attachment to a device. This way it is possible to share or keep specific data togheter with the device. The notes can be anything that you need to archive with the device. For example specific configuration settings, manuals or other data that need to be saved.
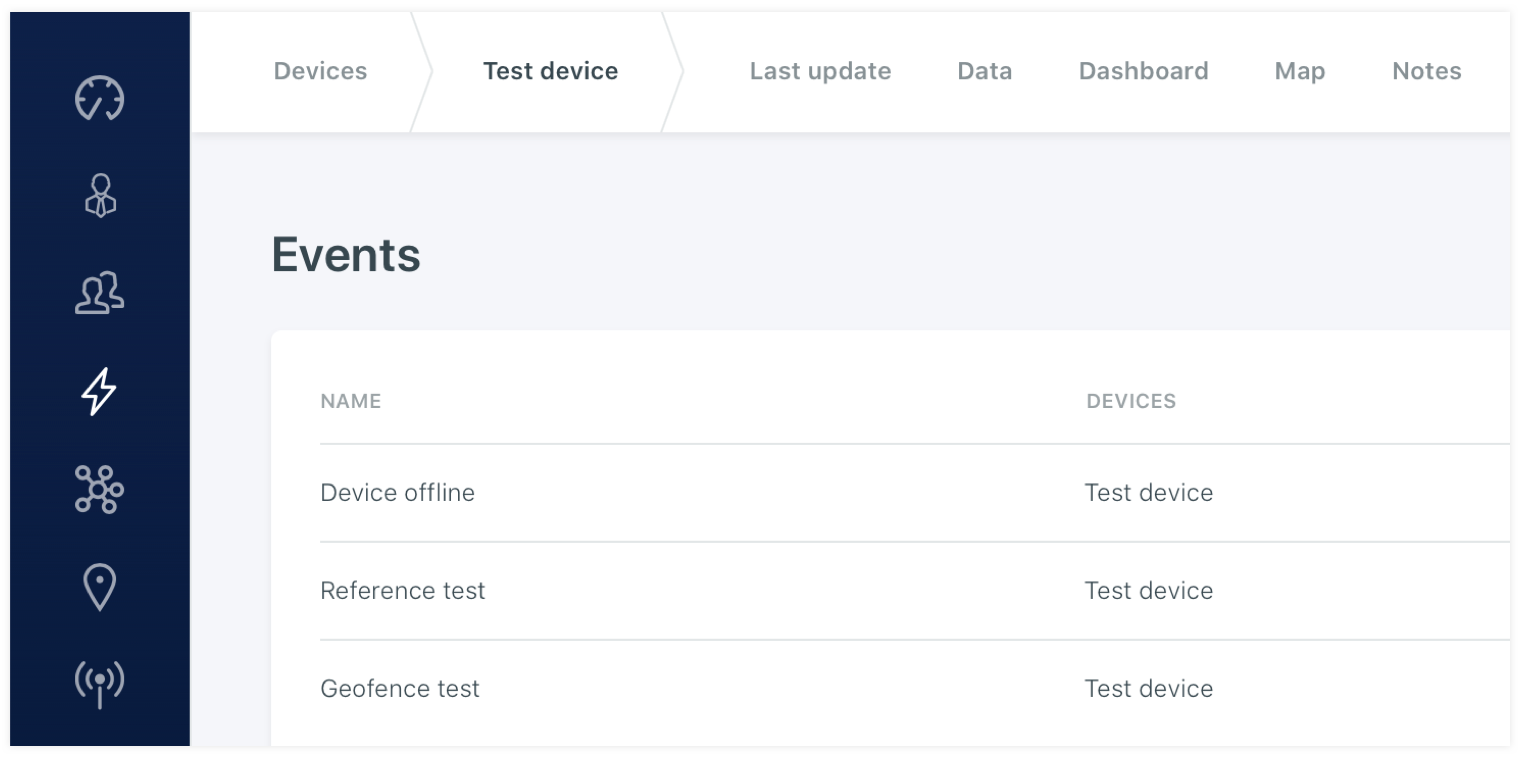
# Events
On the device events detail page you can find the events that are releated to the selected device. From this page it is possible to edit or change the event or add a new related event for the specific device. It is also possible to disable a specific event so it will not get triggered and processed. This way you are able to disable the event for a while, without the need of deleting it and losing its settings.
← User groups Labels →